My latest adventures in Arduino-land got me playing with the serial port. For the purpose of an upcoming project, I wanted to be able to record data readings from various sensors. Sure, I could just print the data to the serial monitor and copy and paste it into a file; but that wouldn’t be much fun! Since you can’t save files directly from Arduino, I’ve had to add Processing into the mix. Below is the detail of the little script I’ve written.
1. A bit more about serial communication
Serial communication is a way for computers (and, in this case, microcontrollers) to talk to one another, by transmission of bytes, split into 8 bits. The data transmitted between the machines is called serial data -because data parameters are transmitted in series- and is usually sent with 10 or 11 bits per byte (the 8 bits of a word + a start and a stop bit). The rate at which the data is transmitted is called baud rate (and in most current digital systems, is equivalent to the bit rate); it is the number of data bits that can be transmitted per second. The default baud rate on the Arduino UNO is 9600.
2. Get Arduino and Processing talking
To get Arduino and Processing talking; there are 2 options. Either use Firmata and the Arduino library for Processing, or keep them separate and have them communicate through the serial port. I chose the latter.
a) Printing data to serial with Arduino
As a web developer, console.log(“text”); is one of my favourite functions in javascript. I like to know what is going on, and if it’s going as expected. I reckon the serial monitor is akin to a browser console for Arduino. However, printing text requires a few more steps than just Serial.print(“something”);
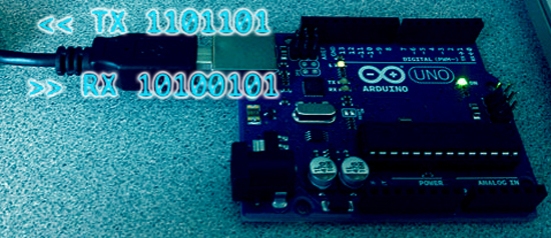
In the Arduino IDE, you can open the serial monitor using the icon in the top-right corner (on Mac), as shown below.

There are 2 different print functions in Arduino; either Serial.print(); or Serial.println(); The second one outputs text with a carriage return.
Now, let’s just try to print out randomly drawn numbers to the serial monitor, using an Arduino UNO.
int chooseNumber = 0;

void setup()
{
  Serial.begin(9600);

  while(!Serial) {
   return;
  }
}

void loop()
{
      Serial.print("Here\'s a random number ");
      chooseNumber = random(1,17);
      Serial.println(chooseNumber);

      delay(3000);
}
In the setup() function, we start the serial communication and set its speed at 9600 (default baud rate for Arduino UNO, as explained previously). Then, in the loop() function, we draw a random number between 1 and 16 every 3 seconds (3000ms delay). And here’s the output:

b) Reading and saving the data from Processing
For this next step, I adapted Daniel Shiffman’s code to save text files from Processing.
Here’s what the Processing sketch looks like:
import processing.serial.*;

// The serial port:
Serial myPort;
String dataReading = "";
String [] dataOutput = {};

void setup() {
size(500,500);

// Open the port you are using at the rate you want:
myPort = new Serial(this, Serial.list()[8], 9600);
//in my case,the Serial port the Arduino is connected to is 9th on the serial list, hence the [8]
//to get access to the serial list you can use >> println(Serial.list());
myPort.bufferUntil('\n');

}

void draw() {

}

void serialEvent(Serial myPort) {
 dataReading = myPort.readString();
 if(dataReading!=null){
    dataOutput = append(dataOutput, dataReading);
    saveData();
  }
}


void saveData() {
  println("saving to txt file...");
  saveStrings("data/data.txt", dataOutput);
}
This code should run when the Arduino is plugged into the computer and the Arduino sketch has been uploaded to the board.
The set up for this Processing sketch has been commented directly in the code, I’ll just detail the rest in what follows.
Even if empty, the draw() function is always needed for a Processing sketch to run properly. The serialEvent() method takes the serial port we’ve set up as a parameter and will be triggered every time there’s a line break in the data that is sent through the serial port , that’s because we’ve set the port to bufferUntil(‘\n’);
In this method, we use readString() to read the data, and if it isn’t empty, we push it to the dataOutput array. We then call saveData() and save the whole array to a text file. It is worth noting that every time saveStrings() runs, it overrides the entire content of the text file; hence the importance of keeping all the data in an array.
Note that you can’t have the serial monitor from the Arduino IDE open when saving to a text file, the data doesn’t print out properly (e.g. the letters get scrambled).
We now have a text file, called data.txt with saved values (the output looks the same as the serial monitor’s in the previous Arduino example).
c) Talking back to Arduino from Processing
Planning ahead of adding a user interface for the recording, I wondered how easy it would be to talk to Arduino from Processing; that’s why I added a simple string being parsed to serial when you click on the stage in Processing. Providing that you’ve instantiated a boolean canStart set to true, here’s what needs to be added to the Processing sketch:
void mousePressed () {
  if(canStart){
    myPort.write("start");
    myPort.write('\n');
  } else {
   myPort.write("stop");
   myPort.write('\n');
  }

  canStart = !canStart;

}
Now, that’s all for Processing, but we need to amend the Arduino sketch so these strings get printed. In the loop() function, we’ll add a call to the checkSerial() method, defined as follows;
void checkSerial() {
  while(Serial.available() > 0) {
    char inChar = Serial.read();

    Serial.print(inChar);

  }
}
We check if the serial is receiving anything (Serial.available() >0), and we read the value of what it receives as a character. The problem with the above method is that it saves every single character of the string to a new line, we now need to concatenate the string before we print and save it. Let’s set up an empty string called command (because it will be a command to start or stop later). We can now amend the checkSerial() function.
void checkSerial() {
  while(Serial.available() > 0) {
    //we read the incoming characters
    char inChar = Serial.read();

    if(inChar == '\n'){
      //if there's a line break, we print the string
      Serial.println(command);

      //we reset the string once it is printed
      command = "";
    }

    else if(inChar !='\r'){
      command += inChar;
      //we keep appending characters to the string until we meet a break line or space
    }

  }
}
And voilà! The saved data file now shows “start” and “stop” among the random numbers, when there’s been a click on the Processing stage.
3. Adding a GUI to control the capture of the data
I thought it would be nice to add a user interface to the Processing app, to have a bit more control over the recordings.
That way, I can record my sensors’ measurements within a set period of time; they’re not constantly saving data that might not be relevant when no one’s interacting with them.
(Or in this demo, there’s no need for me to print random numbers all the time, just when I choose to do so).
a) Start/Stop recording button
First of, I added a start/stop button that toggles the data being saved or not. As we saw in the previous chapter, you can parse a string to Arduino (“start” or “stop”) on click. What I need to add now, is a button in Processing that is clickable (as opposed to the whole stage); and a boolean in Arduino that will, upon reading the start or stop string, enable the random numbers to be drawn.
Modified Arduino sketch:
int chooseNumber = 0;
String command = "";
boolean canLoop = false;


void setup()
{
  Serial.begin(9600);

  while(!Serial) {
   return;
  }
}

void loop()
{

    if(canLoop){
      Serial.print("Here\'s a random number ");
      chooseNumber = random(1,17);
      Serial.println(chooseNumber);

      delay(3000);
    }

    checkSerial();
}

void checkSerial() {
  while(Serial.available() > 0) {
    char inChar = Serial.read();

    if(inChar == '\n'){
      if(command == "start") {
        canLoop = true;
      } else if (command == "stop") {
        canLoop = false;
      }

      Serial.println(command);
      command = "";
    }

    else if(inChar !='\r'){
      command += inChar;
    }

  }
}
Modified Processing sketch with toggle button:
import processing.serial.*;

// The serial port:
Serial myPort;
String dataReading = "";
String [] dataOutput = {};
boolean canStart = true;

//GUI stuff
int rectX = 200;
int rectY = 200;
int rectW = 100;
int rectH = 50;

PFont font;
String command = "";

void setup() {
  size(500,500);
  font = createFont("Helvetica", 20);


  // Open the port you are using at the rate you want:
  myPort = new Serial(this, Serial.list()[8], 9600);
  myPort.bufferUntil('\n');

}

void draw() {
  background(200, 200, 200);

  if(canStart) {
    command = "START";
    fill(0, 255, 0);
  } else {
    command = "STOP";
    fill(255, 0, 0);
  }

  noStroke();
  rect(rectX, rectY, rectW, rectH);
  fill(255);
  text(command, rectX + 30, rectY + 30);
}

void serialEvent(Serial myPort) {
 dataReading = myPort.readString();
 if(dataReading!=null){
    dataOutput = append(dataOutput, dataReading);
    //print(dataOutput);
    saveData();
  }
  println("serial event");
}

void mousePressed () {
  if(buttonOver()){
    if(canStart){
      myPort.write("start");
      myPort.write('\n');
    } else {
     myPort.write("stop");
     myPort.write('\n');
    }

     canStart = !canStart;
  }


}

void saveData() {
  println("saving to txt file...");
  saveStrings("data/data.txt", dataOutput);
}

boolean buttonOver()  {
  if (mouseX >= rectX && mouseX <= rectX+rectW &&
      mouseY >= rectY && mouseY <= rectY+rectH) {
    return true;
  } else {
    return false;
  }
}
What we’re doing here is adding a rectangle on the stage and checking whether the mouse is over the rectangle when there’s a click. If yes, a start or stop command is sent over to Arduino, and the rectangle is redrawn with a different background colour and text.
b) Input text
Finally, I found it handy to add an input text field that appears after each data capture.
The final Processing sketch is below: the text field appears when the stop button is clicked; the start button is then disabled until some text is entered and the Enter key is pressed.
For this, I used the Typed Input code from the Processing wiki.
import processing.serial.*;

// The serial port:
Serial myPort;
String dataReading = "";
String [] dataOutput = {};
boolean canStart = true;

//GUI stuff
boolean canInput = false;

int rectX = 200;
int rectY = 200;
int rectW = 100;
int rectH = 50;

String typedText = "Comments: ";
PFont font;
String command = "";


void setup() {
  size(500,500);
  font = createFont("Helvetica", 20);


  // Open the port you are using at the rate you want:
  myPort = new Serial(this, Serial.list()[8], 9600);
  myPort.bufferUntil('\n');

}

void draw() {
  background(200, 200, 200);

  if(canStart) {
    command = "START";
    if(canInput){
      fill(140, 217, 140);
    } else {
      fill(0, 255, 0);
    }
  } else {
    command = "STOP";
    fill(255, 0, 0);
  }

  noStroke();
  rect(rectX, rectY, rectW, rectH);


  if(canInput){
    fill(200, 200, 200);
    text(command, rectX + 30, rectY + 30);
    fill(0);
    text(typedText+(frameCount/10 % 2 == 0 ? "_" : ""), rectX, rectY + rectH + 20);
  } else {
    fill(255);
    text(command, rectX + 30, rectY + 30);
  }
}

void serialEvent(Serial myPort) {
 dataReading = myPort.readString();
 if(dataReading!=null){
    dataOutput = append(dataOutput, dataReading);
    saveData();
  }
}

void mousePressed () {
  if(buttonOver() && !canInput){
    if(canStart){
      myPort.write("start");
      myPort.write('\n');
    } else {
     myPort.write("stop");
     myPort.write('\n');

     presentInputText();
    }

     canStart = !canStart;
  }


}

void saveData() {
  saveStrings("data/data.txt", dataOutput);
}

boolean buttonOver()  {
  if (mouseX >= rectX && mouseX <= rectX+rectW &&
      mouseY >= rectY && mouseY <= rectY+rectH) {
    return true;
  } else {
    return false;
  }
}

void presentInputText() {
  canInput = true;
}

void resetInputText() {
  canInput = false;
  myPort.write(typedText+"\n");
  typedText = "Comments: ";
}

void keyReleased() {
  if (key != CODED) {
    switch(key) {
    case BACKSPACE:
      typedText = typedText.substring(0,max(0,typedText.length()-1));
      break;
    case TAB:
      typedText += "    ";
      break;
    case ENTER:
    case RETURN:
      resetInputText();
      break;
    case ESC:
    case DELETE:
      break;
    default:
      typedText += key;
    }
  }
}
That’s it for now but we could, for example, use another input field to determine which file to save the data to. But I think you get the idea, so I won’t go into too much detail; let’s just finish off.
c) TA-DA!
Now, instead of just generating random numbers, you can add whatever sensors you’d like to your circuit and your Arduino sketch and print their data to serial in order to save it and analyse it later.
I will play around with a Force Sensing Resistor and an accelerometer; but you could have a temperature or light sensor, for example.
Taking it to the next level, why not reorganise the data to be saved to a CSV file and re-use it with D3.js to make nice graphs? Arduino blog also recently posted an article about Plotly, a data visualisation tool that recently released an API for Arduino. Unfortunately, I haven’t had a chance to look into it yet. Feel free to try it for yourself and keep me posted! 🙂
Related articles:
Introduction to Arduino Serial Communication
TX and RX signals
Processing Serial Library

Pingback: Countdown to Christmas | 300 LEDs before Xmas
hi there. i got a situation here and really need your help. is there any possible way to produce alphabet in the processing monitor that reads the input from arduino ?
it was great if you could help me with this mini project thing cause i’m really a newbie 😦
Hi, it sounds like it’s doable, but I need to know a bit more about your project. What kind of input are you thinking of, and what exactly do you want to display in Processing?
I am using flex sensors as the input and basically, i would like to create a talking gloves which can display alphabet on the Processing so that every different movement of the flex sensor will give different letter.
Well, I would start by reading your inputs in Arduino and associating the results with the desired letter. And once you’ve got the letter, parsing it to Processing to Serial. Or you could just use the Serial Monitor in Arduino, if it’s just to print out letters?
Hey,
I want to read a csv file containing sensor data from processing and put the data file into the arduino to run the servo motor.I want to know how to do it.
Hi, to read the csv in Processing, try using this sketch or have a look at the loadTable() function. From there, you can send the values over Serial to Arduino. Hope this helps 🙂
hi, where can I find the text file that stored the data from arduino?
Hi,
at the root of your Processing project, you’ll have a /data/ folder with data.txt saved there.
Hi, I am still confused where this folder and file are on my computer. I am using a Mac and was able properly to alter your code when opening the port but I am struggling finding where this data is being stored. Thanks
Actually just figured it out, but thank you!